Problem with buying new shiny is that you have to paint it! This years haul from Salute included 2 Baccus 6mm Union and Confederate army packs and a booster infantry pack for each so a hefty haul of lead that I now have the daunting task of having to paint!
As a Lee, hell my father is Robert Lee unfortunately R J not R E, my leaning has always been towards the Rebels. Having a romanticised view of the South standing up against those darn meddling yankees trying to enforce their fancy ways on those good ol Southern boys!
Stage1
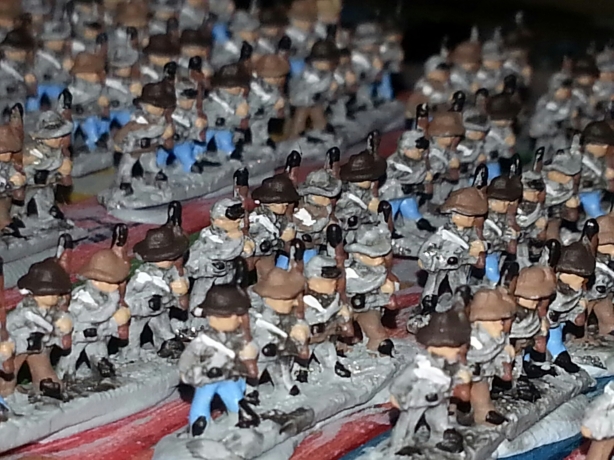
Firstly I would just like to say to those who think at 6mm scale you sacrifice detail, definitely not, the sculpts from Baccus are jam packed full of detail, probably more than my limited painting skills can do justice, with a wide variety of poses. The Rebels have a good mix of kepis, slouch hats and bed rolls that should ensure that no two bases looks identical, a key factor when going for a ragged rebel look. Secondly the sculpts are clean and crisp so minimal prep needed. I am going for the production line method and I am mounting each strip of 4 figures on an ice lolly stick with identical strips of sculpts on the same stick so when painting I can ensure a non uniform paint job.
Stage 2
Undercoating is down to personal preference, my colour of choice is grey. I have used Tamyia fine grey surface primer in the past to good effect but recently I have favoured Vallejo USN Light Ghost Grey. I prefer light grey as I can easily make out the detail which I find with my ageing eyesight black primer masks. Also in this case with painting rebels the predominant colour will be grey so it makes sense.
Stage 3
Give them a generous wash of GW nuln oil. Instantly detail leaps out and a preshading has been done.
Stage 4
I start painting from bottom layer out so skin is GW Kislev Flesh. Now the deuniforming of the ragged rebels begins. There are 3 dominant colours to Confederate uniforms, Grey for jackets, trousers, kepis, slouch hats and bedrolls, Butternut for slouch hats, jackets and trousers and finally light/sky blue for trousers and infantry kepi bands, collars and cuffs of jackets.
I start with trousers I leave 50% grey and have a 30/20% blue and butternut respectively. For blue I use Vallejo Sky blue with hint of Vallejo Prussian blue to darken. For butternut the home dyed cloth of the confederacy I went for either Vallejo german camo pale brown and Vallejo Khaki.
I then painted jackets again I kept most predominantly grey, to get a mixture id shades I dry brushed with Vallejo Sky Grey but also had about 20% butternut again using Vallejo German Camo Pale Brown and Vallejo Khaki.
Stage 5
Hats next, again I wanted a good variety of colours, so again a mixture of greys and browns. The dark brown is Vallejo German black Brown, the lighter browns include Vallejo German Camo Pale brown, Vallejo Khaki and Vallejo Flat Earth.
After hats it was onto crossbelts which I painted white as well as the food sack on their left hip. Canteens where painted with Vallejo Green Grey.
Rifles next these I painted predominantly with Vallejo Mahogany Brown apart from the barrel which was painted with GW Abandon Black and then drybrushed with Vallejo Gunmetal.
Stage 6
Time to get the GW Abandon Black out to paint boots, belts cartridge pouches and kepi peaks
Stage 7
The beards and hair where painted using Vallejo Flat Earth (everyone in my army has brown hair!). The base was then painted Vallejo Flat Earth.
Then the washes start. Any brown areas I washed with GW Agrax Earthshade. Flesh is washed with GW Kislev Flesh and any metal areas get a wash of GW Nuln Oil.
At this stage I now protect the paint by applying Vallejo Brush on Matt Varnish, I used to be a fan of spray on varnish but one frosting incident was enough to now make brush on my chosen technique. It may take longer but as they say spray in haste, repent at leisure.
Stage 8
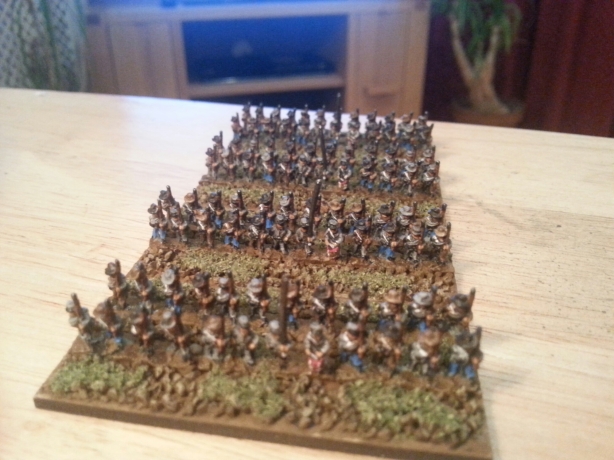
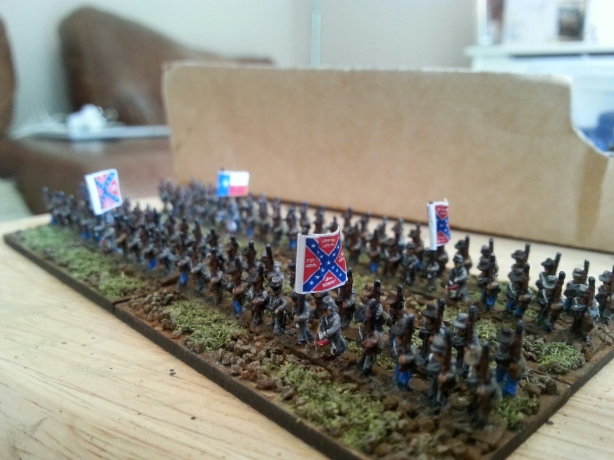
Figures are now based for Altar of freedom in 60×20 mm bases. To ensure I get a non uniform mix of strips I blu tack to bases taking from each lollystick at a time and placing in a different position each time. The only uniformly placed, but not uniformly painted strip, is the command strip. Therefore each base has a Unique look.
Strips are then glued with loctite powerflex gel and then the base is coated in GW PVA glue, yes you can buy it cheaper and by the proverbial bucket load but I find GW glue actually sticks the prerequisite for a glue!
Stage 9
The ground is then painted with a mix of Vallejo Flat Earth, GW PVA glue and water. Once dried I wash with GW Agrax Earthshade and highlight with Vallejo German Camo Pale Brown.
Blobs of GW PVA are then painted on and flock is applied.
Stage 10
The final stage is to add flags and hey presto done.
The biggest lesson I learned was dont get hung up on the detail, these wont be winning any Golden Demons but are to a decent (In my opinion) tabletop standard at arms length. Secondly when production line painting keep the batch to a reasonable and not soul destroying number. My first batch consisted of 24 strips equating to 4 stands which was manageable the second batch 42 strips was too many and I had to really motivate myself at times to get it done Painting 168 faces or pouches can be mind numbing and tiring on the eyes at this scale.
Next up will be command stands and artillery…….


